A Beginner’s Guide to Ditching Dairy

Looking to ditch dairy completely? Confused about where to start? Here are my tips.

2016-07-10 08.11.08.jpg

1) Godairyfree.org. This is the very best resource I have found for everything dairy-free, from product recommendations to restaurant guides. This site is your best friend. The dairy ingredients list is a must-bookmark link for your phone. I’m closing in on 3 years into my dairy-free journey, and I still reference the list.

2) Read labels! If you’re purchasing anything in a box or package (sauces, bread, cereal, seasonings, etc.), read the ingredient list carefully. Dairy is sneaky; it hides in the weirdest places. Don’t just look at the allergen list. Don’t expect dairy ingredients to be in bold font, either. When in doubt, refer to the dairy ingredients link noted above. If you ever wonder about a questionable product, contact the manufacturer for allergen information.

3) Be wary when eating out.  Whether it’s takeout, a 5-star restaurant, or grandma’s kitchen table, be extra vigilant of food prepared by others. Dairy allergies and intolerances are still not understood by the general public. When ordering at a restaurant, always ask the server to double-check with the chef that your food selection is — or can be — prepared dairy-free. (Do not simply take even the most well-intended server’s word for it.) If you have a dairy allergy, make that abundantly, though politely, clear to the waitstaff. Also, take a look at your food before digging in, searching for obvious dairy such as a cream sauce, cheese, or pat of butter. When eating at another’s home, you need to decide the most comfortable option for you: go potluck by bringing your own dairy-free item(s) to share — with the host’s permission of course — or go over your dietary restrictions with the host ahead of time to determine what menu items you will be able to eat. You will find, eating out will be your greatest obstacle.

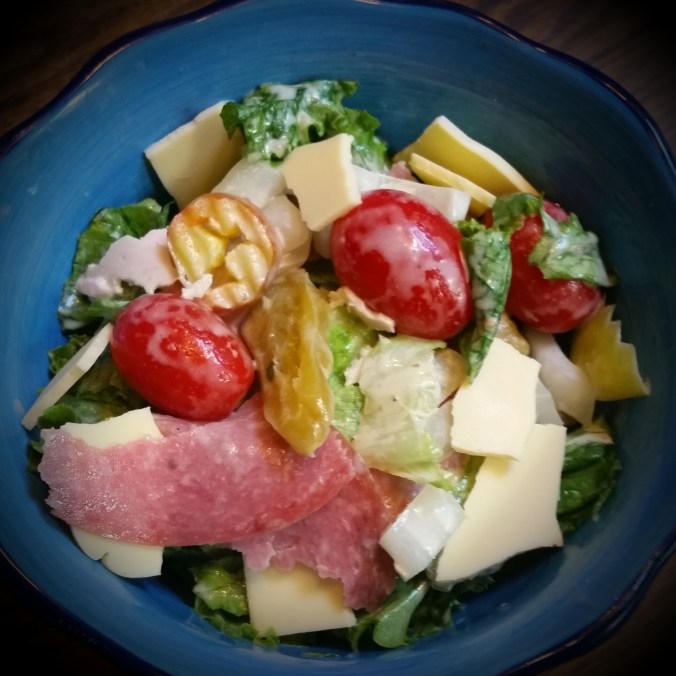
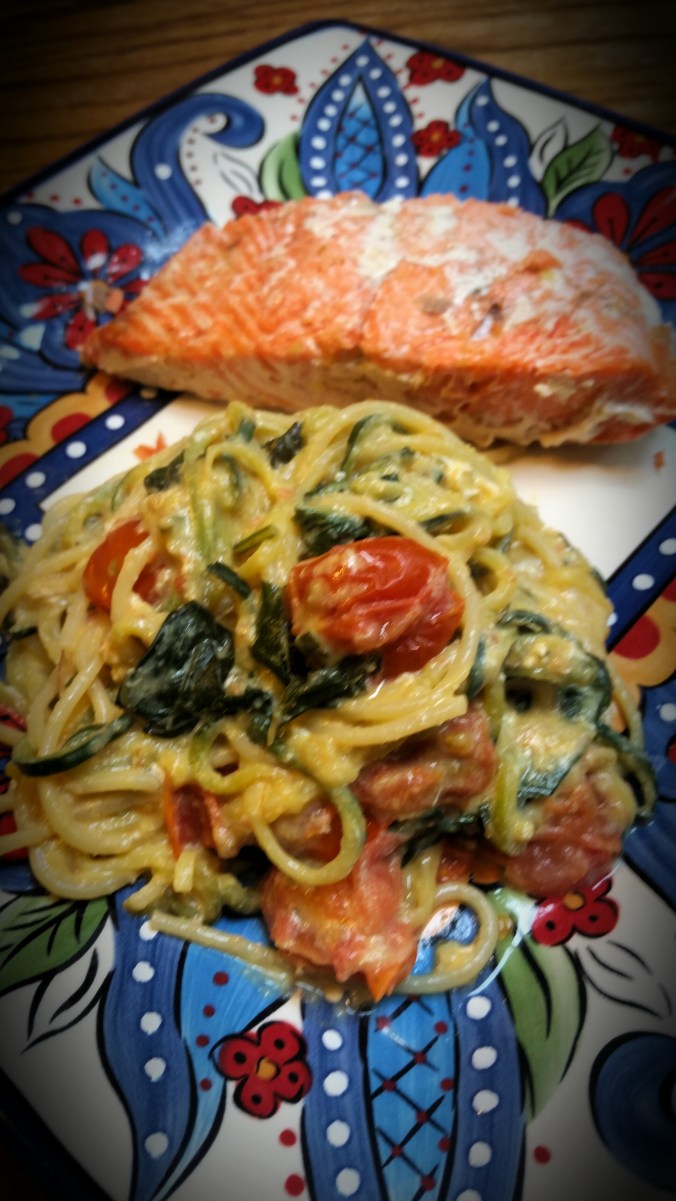
4) Eat naturally dairy-free. When you go dairy-free you have two choices: try to eat as you did before or change your lifestyle to suit your new dietary needs. Don’t get me wrong, there are many increasingly available dairy-free substitutes for everything from cheese to protein powder. However, sticking to a diet that’s predominantly naturally dairy-free will not only be better for your waistline (dairy-free substitutes often contain more fat and extra processing) but for your wallet, as well. Aim for animal or vegan protein sources alongside fresh produce and whole grains, and you’re set.

5) When in doubt, go vegan. New to dairy-free ingredient searches and feeling anxious about making the wrong selection? Choose the vegan option. Since a vegan diet eliminates all animal products and biproducts, dairy will not be an ingredient. However,  if you’re sensitive to cross-contamination, you’re going to want to be even more vigilant (see #9.)

6) Don’t cheat! The better you are about maintaining a dairy-free diet, the easier it is to stay dairy-free. Your tastes will change. You will stop craving dairy. You simply have to power through. The first month will be hard, but things will get easier by the six-month mark. By your first dairy-free anniversary, you’ll likely barely think about dairy, no less crave it.

7) Find basic substitutes you enjoy. I know I said to go predominantly naturally dairy-free, but you will need some substitutes. Do some experimenting to find your preferences. Do you like coconut oil instead of butter, or are you a dairy-free margarine fan? Do you prefer coconut milk, cashewmilk, soy milk, rice milk, oat milk, or hemp milk? Do you like GoVeggie vegan “parmesan” or is nutritional yeast your go-to? Do some taste-testing and recipe experimentation.

8) Learn to make a roux. Cream sauces, cream-based soups, gravies… they become readily accessible once you learn to make a dairy-free roux. My favorite uses Earth’s Balance Soy-free Buttery Spread, all-purpose flour, cashewmilk, salt, and pepper. I add nutritional yeast for a cheesy flavor.

9) Know your sensitivity level. Some people are highly sensitive to dairy, others are not; know where you lie. Can you handle cross-contamination? Can you risk a questionable dairy content? Be knowledgeable. Know your risk so you can make the best dietary decisions for you.

10) “Milk-free” doesn’t mean dairy-free. “Lactose-free”, “Milk free”, “Non dairy”… none of these actually mean “dairy-free.” Confusing, right? The only way to know for sure is to read the labels… carefully.

11) Know what is and isn’t dairy. Eggs are not dairy. Goat’s milk and sheep’s milk are dairy. Butter, ghee, yogurt, ice cream, margarine (if not specifically dairy-free), cheese, whey, and casein are dairy. Mayonnaise is generally not dairy.

12) Learn to self-advocate. Being dairy-free means learning how to navigate a dairy-filled world. You will need to determine how to best advocate for yourself.

13) Find a good grocer. Do your research and find a good grocery store — online or brick-and-mortar — that offers a variety of dairy-free options. The more options you have, the less deprived you’ll feel and the more content you’ll be in your diet.

14) Find a balance, find sustainability. As with any diet, balance is key because without it the eating pattern is unsustainable. Eat healthy but also find dairy-free indulgences that satisfy you. Read labels, peruse product reviews on Godairyfree.org, join a dairy-free group on social media… tasty dairy-free products are out there.

15) Think of it as a new journey, not a burden. Sure, being required to drop all dairy from your diet can be challenging, even isolating at first. You’ll find your way though. You’ll find new recipes, learn new cooking techniques, become more aware of your health, likely eat in a more nutritious manner, and possibly even lose a little excess weight. Sure, it’s annoying not to be able to give in to every cupcake craving or pizza desire, but it’s probably better for you not to do that. You’ll feel better. You’ll live better. In time, it’ll be standard operating procedure… life as usual.

You can do this!

Pickle Discovery & Vegan Soup Find

I have been wasting my life until now! All of the grilled cheese — and “cheese” — sandwiches I’ve eaten and I only now thought to put dill pickle slices in between the goo-ified, crispiness? I haven’t LIVED! Believe me, it’s a must-try.

I also found a delicious, vegan soup at my local farmer’s market made by LAJ Foods. As the kids and I happily sampled the soup, the owner told me her own son has a dairy allergy and that spurred their dairy-free journey. Dairy-allergic, myself, I was hooked. I knew allergen safety would not be a concern with this vendor. I ordered a big container of the creamy kale soup on the spot.

I read the ingredients on the soup container and fell in love with the simplicity: kale, stock (celery, carrot, onion, lemon, kale, garlic), water, onion, coconut milk, nooch, parsley, salt. (For the dairy-free newbies, “nooch” is nutritional yeast, a vitamin-packed vegan powder often used to mimic a cheese flavor.)

After a jam-packed busy day capped off by late afternoon pool fun, an easy dinner was welcome. Our meal: Grilled Chao “Cheese” and Dill Pickle Sandwiches with Creamy Kale Soup. So yum!

2016-06-30 17.43.05


Dairy-free Veggie-sneaking Breakfast

We like breakfast-for-dinner in our house but dinner means loads of veggies to me. So, when the kids requested breakfast-for-dinner, I figured out a way to sneak in as many veggies as possible without tipping them off. Our meal: squash scrambled eggs, zucchini pancakes, and berries.

First, I steamed an entire chopped summer squash, then pureed it in the blender. I cracked 5 eggs directly into the blender cup, sprinkled in salt and pepper, added a dash of garlic powder, and thoroughly blended the mixture. Next, I greased my pan with coconut oil before cooking the blended eggs low and slow on the stove, gently moving the eggs with a spatula frequently.

Next up: zucchini pancakes! I blended one chopped, raw zucchini in the food processor. Then I tossed in 1.5 cups of Wegmans’ pancake mix (our preferred dairy-free pancake mix), 1 egg, a tablespoon of coconut oil, salt, pepper, garlic powder, onion powder, a handful of fresh basil leaves, and a splash of cashewmilk. After processing the mixture, I cooked the pancakes as usual in a hot pan greased with coconut oil.

As the eggs and pancakes cooked, I plated the berries. Easy, healthy crowd pleaser!

SQUASH SCRAMBLED EGGS WITH ZUCCHINI PANCAKES AND BERRIES

2016-06-29 19.24.03

Ingredients

Squash Scrambled Eggs:

1 Summer squash (chopped)

5 Eggs

1 Tbl Cashewmilk

1 tsp Garlic powder

Salt and pepper to taste

Zucchini Pancakes 

1 Large zucchini  (chopped)

1.5 cups Dairy-free pancake mix

1 Egg

1 Tbl Coconut oil

2 Tbl Non-dairy milk

1 Handful fresh basil

1 Tbl Garlic powder (less if you’re not a garlic lover)

1/2 Tbl Onion powder

Salt and pepper to taste

Berries

3 pints of your favorite fresh berries

Directions

For the eggs, grease a medium-sized pan with your preferred oil (I used coconut oil) and heat on low.

Steam the squash in the microwave. Let it stand to cool for a minute before placing it in the blender cup.

Puree the squash until smooth.

Add the remaining egg ingredients to the blender cup and blend until well-mixed.

Pour the egg mixture into the greased and heated pan, gently moving the egg with a spatula every so often.

Plate the eggs once cooked to your desired doneness.

For the zucchini pancakes, grease a large pan with your desired oil (I used coconut oil.)

Place the chopped, raw zucchini into the food processor and process until uniformly chopped.

Place all of the remaining pancake ingredients into a food processor and blend until smooth.

Cook pancakes as usual, pouring dollops of batter onto the hot pan and flipping each pancake over as air bubbles begin to appear.

For a greener zucchini pancake, cook on low. For a more golden zucchini pancake, cook on medium.

Plate pancakes once prepared and top with your preferred butter substitute  (I used Soy-free Earth’s Balance.)

Pile your favorite fresh berries onto each plate, and enjoy!


Vegan Vanilla Frosting

#3’s first birthday was nearing and I needed dairy-free frosting for his cake. I contemplated going the easy route and buying the generally dairy-free Duncan Hines canned frosting, but those have a funky aftertaste and way too much sugar for my taste. So, homemade it was.

I wanted something easy, something with few ingredients, something not terribly processed. I found a recipe online for a dairy-free vanilla frosting and prepared the concoction according to the instructions.

The frosting was good but not great. It wasn’t quite vanilla-y enough for me, it was a tad too salty, and it was too sugary. So I tweaked the recipe,  decreasing here and substituting there to create my own recipe. I much preferred it… Hubs and #1 did too. Here’s how I made it.

VEGAN VANILLA FROSTING 

Vegan Vanilla Frosting

Vegan Vanilla Frosting

Ingredients

1 1/4 cup powdered sugar
3/4 cup coconut oil (chilled)
1 tsp pure vanilla extract
1 small pinch salt
1 Tbl non-dairy milk

Directions

Add all of the ingredients into the bowl of an electric mixer.

Mix on low, scraping the sides of the bowl often (be sure to turn off your mixer when doing this.)

Gradually increase the mixer’s speed until you reach the highest setting, still stopping to scrape the bowl sides so everything gets blended.

Mix until the frosting reaches the desired texture.

Store in an airtight container and refrigerate if not using immediately.

Dairy-free Sub Salad

It’s Father’s Day weekend, so I wanted to make a dinner that appealed to Hubs’ tastes — burgers, barbecue, hoagies, etc. — but stay on the healthier side. So, I made a Dairy-free Sub Salad. A hoagie in a bowl!

I topped green leaf lettuce with Vidalia onions, cherry tomatoes, and mild banana peppers. Then came the deli meats: no-salt-added turkey breast, low-fat ham, and Genoa salami. (If you’re concerned about cross-contamination, kindly ask the employee at your deli counter to switch to a fresh deli slicer blade before he or she slices your meats. Asking him or her to wipe down the machine would be an additional safety measure.) A simple dairy-free adjustment — Chao Creamy Original Slices instead of Muenster –made this sandwich-turned-salad safe for all of us to eat. Drizzled over top: a dijon, hoagie oil, and mayo dressing. It was a hit!

DAIRY-FREE SUB SALAD 

Dairy-free Sub Salad

Dairy-free Sub Salad

Ingredients

Dressing:

2 Tbl mayonnaise

2 Tbl Hoagie oil

1 Tbl Prepared dijon mustard

Salad:

1/2 Head of green leaf lettuce (torn into bite-size pieces)

1 cup mild banana peppers  (drained)

3-4 handfuls cherry tomatoes

1/4 cup Vidalia onion (chopped)

1/4lb no-salt-added turkey (torn into bite-size pieces)

1/4lb low-fat ham (torn into bite-size pieces)

4 slices Genoa salami (torn into bite-size pieces)

Directions

Place the salad ingredients in a large salad or mixing bowl.

Mix the dressing ingredients in a separate container.

Drizzle the dressing over the sald.

Toss the ingredients together thoroughly.

Plate and serve immediately.

Enjoy!

Sippy Cup and Bribery Tip

Out and about without a spill-proof cup? Looking for a bribe that will secure you a semi-sane errand but won’t inundate you with mom guilt? Good 2 Grow Juice Waters!

With loveably recognizable cartoon character tops, a closeable sports bottle style spill-proof spout, high availability (everywhere from Target to Rite Aid, gas stations to grocery stores), a wallet-friendly price, and a reasonable nutritional content, these juices and juice waters are great.

Instead of packing sippy cups for a family trip, we buy a couple of these juices to entice the kids to behave like human offspring through the destination grocery run. Once the juice bribes have been earned and consumed, we wash and refill the containers with water as we would a standard sippy cup for the remainder of the vacation.

Once emptied, scrub the containers as you would a baby bottle or toss them on the top rack of the dishwasher to reuse and refill them. (Don’t hold onto them for too long though, as thorough crevice cleansing is problematic.)

Note: As with all foods you provide your children, be a conscientious caretaker and look into the juice bottle when you remove the foil safety cover. Even take a quality control taste if you’re so inclined. There are rumors that some people have found mold and such inside purchased juices but, full disclosure, I’ve found odd things in pre-packaged items I’ve purchased for my own consumption. So I’m not leading a boycot. If it looks off, toss or exchange it; if it looks fine, enjoy it!

Healthy, Dairy-free Packable Kid-friendly Lunch

Hummus dippers are a hit around here. The kids, Hubs, and I all love them. Heavy on the veggies and light on fat, it’s a healthy packable option.

You can use whatever raw veggies you like best. Sugar snap peas, broccoli, fennel, green beans, asparagus, romaine leaves, mushrooms, and radishes are fun. The kids were anti-bell-peppers because… I have no idea why. A unicorn farted and the wind changed… your guess is as good as mine. So we did cucumber, carrot, and cherry tomatoes alongside the grilled chicken and Doctor Kracker Seeded Spelt Crispbreads. You could easily substitute pita chips or pita bread for the crispbreads. Triscuits and Wasa crackers are tasty too.

Here’s how you throw together this easy, healthy, portable lunch:

Hummus Dippers

Hummus Dippers

HUMMUS DIPPERS

Ingredients

– Grilled chicken strips (we used homemade from a large batch of chicken breasts we grilled, sliced, and froze, but packaged grilled chicken strips are also an option)

– Carrot sticks

– Cucumber slices

– Cherry tomatoes

– Dairy-free whole grain crackers/crispbreads

– Hummus (Sabra makes individual to-go portions but we just scooped from the tub this time)

Directions

– Place the chicken and veggies into a sealable container.

– Pack the crackers separately to avoid sogginess.

– Scoop hummus into an individual portion size container or throw in a prepackaged individual serving of hummus.

– Add a beverage, a freezer pack, and a side of fruit for a healthy, portable lunch.

Kid-friendly Packable Dairy-free Lunch

With summer unofficially starting for some, packable lunches for kids and adults alike are a must. Road trips, beach vacations, playdates, camps, outdoor concerts, picnics… summer is full of meal-packing opportunities, (especially if you’re dairy-free.) Here is one of our favorite packable meals:

DECONSTRUCTED FAJITA DIPPERS 

Deconstructed Fajita Dippers

Deconstructed Fajita Dippers

Ingredients

-Grilled chicken strips (ours were homemade… we had made a big batch of grilled chicken breast, sliced up the extra, and froze it, but the pre-made packaged strips are also an option)

-Bell pepper strips

-Cherry tomatoes

-UTZ Multigrain Tortillas (or your favorite dairy-free tortilla chips)

-Guacamole (I used Wholly Guacamole Classic Minis, but homemade guac is a great option too)

Directions

Place the chicken, peppers, and tomatoes into a sealable container.

Pack the chips separately.

Either toss in a prepackaged individual serving of guacamole or scoop the desired amount of your own guacamole into a small container.

Include a beverage, an ice pack, and a side of fruit for an easy packable lunch.

Save Money, Save Time, Save Your Produce

Have fruits or veggies that are at the use-or-lose point? Ready to head out of town but your fridge is stocked with fresh produce? Don’t have time to whip up a produce-heavy recipe to use it all up? Freeze it!

Use-or-lose fresh produce

Use-or-lose fresh produce


I meal plan but life happens, so sometimes we wind up with unused produce but I’d loathe to waste it. When this happens, I grab the produce, my cutting board, a sharp knife, a couple of gallon size freezer bags, and a permanent marker.

I rinse the veggies, chop them, put them in a freezer bag, label the bag with the type of produce and the date, and position the bag flat to freeze. Next time I need to throw together a quick meal, I thaw the bag of veggies (or wack the bag on the counter, grab the desired amount of frozen produce from the bag, reseal the bag, and toss the unused portion back in the freezer) to use in a recipe.

Rinsed, chopped, and labeled produce ready for the freezer

Rinsed, chopped, and labeled produce ready for the freezer

Stir fry, pasta, couscous or quinoa dishes, rice bowls, omelets, pizza toppings, soups, stews, smoothies… the prepped frozen produce makes meal prep a cinch. And, bonus: no waste!

Broiled Salmon with Zucchini Pomodoro

Ok, this was a hit! I threw it together in 30 minutes flat while putting away groceries and refereeing playroom mischief.

First, while preheating the broiler, I drizzled a filet of wild caught Alaskan salmon with olive oil and sprinkled it with salt and pepper. I created a tin foil pouch around the salmon and broiled the fish until cooked through. Then I let it rest uncovered.

After removing the salmon from the oven, I placed two pints of rinsed, whole fresh cherry tomatoes in a greased baking dish. I popped the tomatoes under the broiler for a few minutes until they began to blister and burst.

Meanwhile, I used my spiralizer to create zucchini “noodles” from 5 fresh zucchini. I drizzled a large pan with olive oil, then cooked the zucchini for a few minutes, gently stirring with tongs, to release the water. Next, I drained the zucchini in a mesh strainer before returning it to the pan.

I started boiling a handful of angel hair pasta until al dente. As the pasta cooked, I took the tomatoes from the oven and poured them right into the zucchini pan, juices and all. Next, I tore leaves of fresh, washed basil and tossed them straight into the zucchini pan.

I stirred in salt, pepper, nutrional yeast, brewer’s yeast, garlic powder, and onion powder. Then, I used tongs to pick up and move the al dente pasta from the boiling water to the zucchini pan. This way, a bit of the startchy pasta water made it into the zucchini pan. Finally, I lowered the heat and cracked two eggs into the pan, mixing well. Once the egg evenly coated the zucchini mixture, I turned off the heat and served.

Broiled Salmon with Zucchini Pomodoro

Broiled Salmon with Zucchini Pomodoro

BROILED SALMON WITH ZUCCHINI POMODORO 

Ingredients:

SALMON-

1 salmon filet

Olive oil (drizzled)

Salt & pepper, to taste

ZUCCHINI POMODORO-

5 zucchini

2 pints cherry tomatoes

1 small handful uncooked angel hair pasta

4Tbl nutritional yeast

3Tbl brewer’s yeast

3 handfuls of fresh basil leaves

Garlic powder, onion powder, salt and pepper, to taste

2 eggs

Directions:

Place the salmon in a foil pouch and position in a baking pan.

Place the salmon under the broiler on high until cooked through.

Spiralize the zucchini into a fine noodle shape.

Drizzle olive oil in a pan, then add zucchini and cook on medium heat — turning gently with tongs — to remove the excess water.

Remove the zucchini from the pan once heated and place in a mesh strainer.

Remove the salmon from the broiler once cooked through.

Uncover the salmon and allow to rest.

Place cherry tomatoes in a greased baking pan and put under the broiler.

Put the spiralized, strained, and cooked zucchini back into the pan.

Drizzle the zucchini with olive oil, then tear fresh basil directly into the pan.

Boil water and cook angel hair pasta until al dente.

While the pasta cooks, stir the yeasts, garlic powder, onion powder, salt, and pepper into the zucchini.

Once the tomatoes are blistered and bursting, remove them from the broiler and put the tomatoes and their juices directly into the zucchini pan.

Use tongs to move the al dente pasta from the boiling water to the zucchini pan, allowing a bit of the startchy pasta water to enter the zucchini pan as you transfer the pasta.

Crack two eggs directly into the zucchini pan.

Reduce the heat to low and stir the eggs in thoroughly.

Serve and enjoy!